The wrong lighting
Lighting makes a huge difference to the appeal of an image. If there isn’t enough light then the photo will appear dark and grainy, too much light and the image will be over-exposed, reducing the amount of detail visible.
The use of incorrect lighting can cause a room to look gloomy and discolour walls, reducing the overall appeal of the photo.
Solution
To gain the best overall exposure of a room, not too light and not too dark, is to use HDR bracketing.
This is a photography technique where multiple photos are taken at different exposures of the same area, to capture the most detail.
In the editing process, the images are then overlayed and edited together to create one well-exposed photo. This process is used by nearly all professionals when taking photos of areas that have very bright and very dark sections.
Another great way to ensure a room feels light, fresh and airy is to open all windows and turn on the lights. This will reduce the amount of shadow in the room and help to brighten a space when taking photos.
Before and after using HDR Bracketing
Keep it neat
A cluttered or messy room will always look worse in photos. Every shot needs to be carefully considered and personal items need to be put away - no one ever wants to see other people’s mess lying around.
Even if the current owners are still living there, items will need to be arranged to get the best shot.
Before and after clutter was removed. Clearing items away can completely change a room and immediately create the feel of more space.
Solution
Even though a property may be clean, every photo should be carefully considered and staged to get the best end result.
We recommend using and providing owners with a ‘pre-photography checklist’, so that the property is ready to go for when the photos are taken.
If the property is still cluttered, you can always edit unwanted items out of your images. Item removal is a fast and affordable way of removing things that may be ruining an image.
Make it relevant
Only include shots that provide something of value to the marketing of the listing. We often see too much focus on irrelevant items in the image slideshows used to market properties online.
This is one of the biggest turn-offs and time wasters for potential buyers and tenants.
Nice, but not relevant for a property listing.
Only include images or close-ups of things that come with the home. It is becoming too common that agents are including images of items, such as fruit bowls and nice furniture, which aren’t included with the property.
Solution
Be selective in the images you use, and only include those that show the good features of the property. All the images used should tell a story and add value to the property - you want to show off as many features as possible in the most appealing way.
Here are examples of the different angles that should be included in your advertising:
Poor quality
The biggest error many estate agents and property managers make is using poor quality images.
Especially with low-cost listings, many agents think it is ok to use grainy images…it’s not! Poor images not only affect the time it will take to sell or let a property, but it will also reflect poorly on your agency’s brand.
Property advertising requires high quality images, smartphones and basic point and shoot cameras just don’t provide this.
To get the images required for effective marketing, you need to use a DSLR camera. Research shows that listings shot with a DSLR camera sell for more and faster than those that were not.
The first image is an example of a poor-quality image, obviously taken on a smartphone. The second is of a similar scene taken with a DSLR camera. Notice how more of the scene has been captured and the image is crisper.
Solution
Learning how to take your own photos isn’t hard, it requires the correct equipment, some practice and knowing basic techniques to get started. BoxBrownie.com have put together some great articles on our blog to guide you in selecting a DSLR camera.
Avoid reflections
There is nothing more unprofessional then flicking through images of a listing and seeing a creepy reflection of someone in a bathroom.
All good photographers have the skills to avoid getting their reflection in a shot, this also includes the reflection of a flash and the camera.
Solution
Try using different angles in a room that has reflective surfaces, like kitchens and bathrooms, to reduce the chances of getting caught in the photo.
Sometimes it isn’t possible to completely avoid a reflection, especially in small, tight spaces. This is where post-shoot item removal editing comes in handy.
All you need to do is take you photo as normal, then use an image editing service to remove the unwanted reflection.
Sometimes it’s impossible to avoid catching your reflection in an image. Using an editing service to remove it is a great solution.
When taking a shot in rooms like bathrooms and kitchens, we recommend using the self-timer on your camera then stepping out of the room. This will make it easier in the post-shoot editing process.
No photo editing
Not editing your real estate photos is just as bad as over-editing. Unedited photos can be misleading, as a flash or bad lighting can affect colours, blur images and distort objects.
All photos need to be edited to ensure the professional presentation of a property.
The editing of photos used for advertising needs to be done well to ensure that you maintain a professional appearance in your marketing.
The benefits of photo editing are obvious, we know which image we’d click on first!
Solution
You can choose to edit your own images, but this is time-consuming and normally takes experience to do well. We recommend outsourcing your image editing to a service like BoxBrownie.com, which was created by a real estate photographer who wanted to save time on image editing.
All you do is upload your images, select the edit you require, click submit and you’ll then have your professional looking image back within 24 hours.
Editing your images can solve a variety of problems. Bad lighting can be fixed with image enhancement, an empty space with virtual staging, and gloomy skies with a day to dusk edit.
By avoiding these common mistakes you’ll ensure your listing stands out online and attracts more buyers and tenants. Having great property photos isn’t hard, it just involves practice and knowing some handy tricks!
*Brad Filliponi is a director and photographer at BoxBrownie.com






.png)


.jpg)
.jpg)





%20-%20IMAGE%20Client%20Accounting%20%E2%80%93%20what%20are%20your%20options.jpg)


.png)
.png)
.png)
%20(002).png)




%20(002).jpg)


.png)



Join the conversation
Jump to latest comment and add your reply
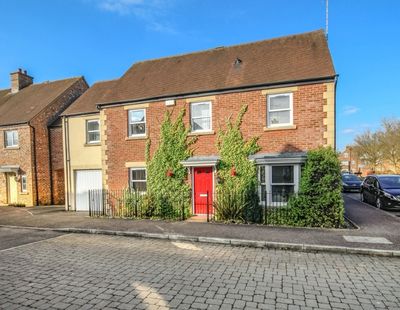
Photos with a blue sky and a wet drive look awful. If the drive is wet just go back another day and don’t be lazy, your vendor will appreciate it!
The sun often comes out after it has rained!
Photoshop works for me
I don't like HDR because it so often fails to get the correct wall color, and it does not take care of color casts. Better techniques including exposing for windows and lighting the interior, or manually blending flash and ambient exposures.
Blue sky and rain on the ground, what a terrible photo, dont be so lazy and retake this on a better day. If this is your prime photography example I would use someone else.
It's very necessary to require the photos fastidiously cause this can be the primary impression to the shoppers. Another factor is to edit them by professionals you'll be able to search and make contact with the businesses that provideclipping path service conjointly icon retouch service. payment couple of bucks will increase your sales.
Please login to comment